Wednesday, August 17, 2011
Goodbye DC
So long DC. We've had a good run during the past four years. For those of you who may not know, I've recently moved to North Carolina to start graduate school. It seems appropriate to me at this point to end the "Lauralicious in DC" blog. To all my readers, thank you for all of your wonderful comments over the past four years.
Monday, August 1, 2011
Follow me on Pinterest

Recently joined a visual bookmarking site called Pinterest. I've found this to be a really fun and useful tool for making notes of images and ideas that I like. I'm quite taken by it!
If you're interested, follow my pins at http://pinterest.com/laurakwagner/
You can catalog or "like" pictures and webpages, and categorize them into "boards" which are visual bookmarks of those things. So far I've started some boards for crafts, home decor, and recipes. I wish this had been around ages ago when I first started following craft and food blogs.
This is a much easier alternative to my previous system of starring things in google reader (which was unorganized and hard to search), bookmarking in my browser (which was forgettable, unorganized, and not portable), and saving jpg's on my desktop (not portable, and I'd lose the original links). I don't like to inundate my Facebook and Twitter friends with shared links or links, so this is a great outlet for that!
Another great aspect of this site is that it's portable. I've already used the iPhone app a couple of times when I'm at the store and want to look up something I've "pinned." They didn't pay me to say this - I've just been super impressed at how useful this tool has been and how seamlessly I've been able to integrate this into my existing projects.
Do any of you use Pinterest also? Please leave your comments and feedback on this post.
Saturday, July 30, 2011
How-to: Mixed-media art using maps
 |
| Painting - "Traveling nature" |
Places featured: North Carolina (Chapel Hill, Great Smoky Mountains), Maryland (Ocean City, Baltimore), Hawaii (Oahu, the Big Island), Arizona (Phoenix, Sedona, Grand Canyon), Florida (Miami), The Bahamas, Pennsylvania, Washington DC area, Mexico, New York (NYC), California (San Francisco), and Massachusetts (Boston).
I get inspiration from the various crafts and art blogs that I read, as well as from items I see in stores. (Note: I'm not affiliated with these blogs or stores at all, these are just items I happen to like.) I first got the idea for the color block background from this rug from West Elm:
 |
| http://www.westelm.com/products/tribal-leaf-rug-r890/ |
For awhile the painting was just the orange and brown background. I was going to paint a big leaf on top, like the West Elm rug, but it didn't feel right to me to just copy something I'd seen in a store.
Then I saw these cute collages with maps. I really liked the idea of repurposing maps into wall art.
 |
| http://www.notonthehighstreet.com/bombus/product/bespoke_map_heart |
Looking for an interesting way to arrange the maps, I found this arrangement of leaves via Pinterest:
| http://abeautifulmess.typepad.com/my_weblog/2011/05/flower-girl-leaves-from-janae-and-kendra.html |
Here's a how-to for making mixed-media art with maps:
Materials and cost:
- Canvas: $20
- Brushes (small to medium flat and angled brushes for the leaves, larger paint brushes for the background): $5
- Acrylic paint or flat wall paint: 75 cents to 8 bucks each, depending on size
- Outdoor Mod Podge: $6
- Plain scrap paper, pencil, painters tape, ruler for measuring and tracing
- Maps : free online
- Color ink for printing: $25 for 1 cartridge
When buying materials like canvas or paint, my tip is to wait until your local art supply store has a sale or offers a good coupon. I found this canvas for something like 60% off in January. These are items which are perpetually available, so it just makes sense to wait for a good deal.
1. Paint the background of the canvas. I used painters' tape and a rule to get a straight line. I first painted one side with the brown paint and then the other side with orange paint. To get this orange color, I had the smallest size of paint can (half-pint?) mixed at a paint store. For the color to be consistent, I recommend getting the paint pre-mixed to the color you want, instead of buying tubes of paint and mixing yourself. This step takes about 30 minutes for each color block, spread out over 1-2 days.
2. Find and print the maps. I searched for maps (e.g., "Grand Canyon map") with google image search and filtered for only Large images which would print best. Most of my maps I printed out to fill 1 entire sheet of paper. Using saved maps from travels is another option too. This took me a few hours on 1 day.
3. Cut out the designs you want for your collage from plain or scrap paper, sketching them out with a pencil first. I used leaves, but you could design and cut out whatever shape you want (hearts, circles, etc.). I think this step is really important for testing out the shapes before you cut out the maps.
4. Test out your arrangement of leaves on the canvas until you get something you like. If you want, you can use tape or temporary glue to hold the pieces in place, especially if it is a very exact arrangement. Steps 3-4 take about an hour (depending on how long it takes you to get the result you want)
5. Then, using the "test" pieces as a template, trace out the leaves on the maps and cut them out. Note: If you wanted an even more precise shape, you could design a template using graphics software like photoshop and edit the maps before printing them out. This you can do in about 15-30 minutes.
6. For the solid-colored leaves, I painted the plain pieces with acrylic paint (and then making sure they were dry before gluing to the canvas). I chose to do this rather than painting directly on the background, which would not have been as solid. This takes another 15 minutes or so.
7. Now position the leaves on the collage. Brush the mod podge on the pieces, stick them down, and then brush on a layer of mod podge over the pieces. This step is actually pretty quick if you do it all at once - maybe an hour, but if you spend additional time adjusting anything or repainting, that adds to the time for painting and drying.
8. When it's dry, brush at least 1 layer of mod podge over the entire canvas to seal it. At this point you could build up the layers using different stroke patterns if you wanted more texture. This is a very quick step and only takes about 10 minutes.
A word about the mod podge. I used Outdoor mod podge. I had looked at the bottle of "regular" mod podge glue which said I would have to use an additional sealer on top of it, whereas the outdoor mod podge glue did not require that step. It has a glossy finish that isn't tacky. My paper did wrinkle a little bit (which may have happened with regular version too), but the outdoor version does *not* seem to have reacted negatively to the canvas so far. I also hope that this will make the painting more durable than if I had just used the regular kind.
Cost: Depending on materials you have on hand, this project can be free to about $75 dollars to complete. For example, I had to buy more color ink for my printer, which added $25 to my costs. I mention this because craft projects can often get deceptively expensive, so do them because you want to express yourself and have fun, not because you think it will be cheap. It can be less expensive, but not always. I probably could have bought a manufactured print for $75, which would have looked more professional, but would not have been as unique or meaningful.
So, there you have it. Feel free to share - what creative purposes do you have for travel mementos? Please leave your comments and questions for me on this post.
Friday, July 15, 2011
Exploring the North Shore of Oahu
Day 5:
On our last day on the Big Island, we did a little biking before our flight. But we didn't get so far on our bike ride. The beach trail was too rocky and the only other place to ride was on the highway, so we returned the bikes and hit the beach.
After landing back in Oahu, we went down the Waikiki beach strip to a beach bar overlooking huge crashing waves and surfers. That was awesome. Then we walked out on a bridge going out over the water where we got up close to the big breakers. Nothing like experiencing the big waves (without having to take surf lessons).
Day 6:
Finally, we ventured out to the North Shore of Oahu, which feels less like a shopping mall like Waikiki did, and more like a laidback beach town. We stopped in the town of Haleiwa for lunch, rented ourselves some snorkel gear, and headed for the beach. First we went to Waimea Bay:

Then, we went snorkeling in Sharks' Cove, which has no sharks, but PLENTY of colorful schools of tropical fish. Wish I had an underwater camera so that I could share it with you all. It was breathtaking. I was in the water for an hour gawking at the fish, and it felt like only five minutes had gone by.
Sandy as ever, we dried off and went back to the airport to catch a flight home.
This will be my last adventure for awhile, but I hope that you enjoyed the pictures!
Thursday, July 14, 2011
Driving around the Big Island
Day 4:
This was one of my favorite days of our trip. We rented a convertible and drove around the entire island, seeing volcanoes, incredible ocean views, and lush green forests:


We stopped in Hilo, Hawaii's second largest town, to have a picnic at Leleiwa Beach:


On our way out of town, some big truck cut us off. A local noticed and shouted to us, "Welcome to Hilo!"
All of this led up to arriving at our destination, Volcanoes National Park, where we saw the still-active Kilaeua caldera:
Even though it looks like a warm sunny day, it's actually quite windy around the volcanos. And the sulfur steam smells like burning matches. It comes out of the ground in steam vents that are all around the park:
We drove around the caldera, then we took a short hike on the Devastation trail. Reportedly this was formed by lava flowing through the forest.
On our drive back, we drove past the southernmost point of the US, SURPRISE, it is called "south point." It really feels like the edge of the world, with nothing but fog and black rock looking out over the endless ocean:
This was one of my favorite days of our trip. We rented a convertible and drove around the entire island, seeing volcanoes, incredible ocean views, and lush green forests:


We stopped in Hilo, Hawaii's second largest town, to have a picnic at Leleiwa Beach:


On our way out of town, some big truck cut us off. A local noticed and shouted to us, "Welcome to Hilo!"
All of this led up to arriving at our destination, Volcanoes National Park, where we saw the still-active Kilaeua caldera:
 | ||
| Steam rising from the caldera |
 |
| Sulfur steam rising from vents in the Earth |
We drove around the caldera, then we took a short hike on the Devastation trail. Reportedly this was formed by lava flowing through the forest.
 |
| Devastation trail |
On our drive back, we drove past the southernmost point of the US, SURPRISE, it is called "south point." It really feels like the edge of the world, with nothing but fog and black rock looking out over the endless ocean:
 |
| South Point |
Wednesday, July 13, 2011
Landing on the Big Island
Day 3:
We hit the beach in Oahu in the morning to try some stand-up paddleboarding. Wow, that is harder than it looks. I fell over 3 times trying to balance on the board. But it was fun! I got the hang of it towards the end.
Then we headed to the airport for a quick flight over to the Big Island. Got an awesome view of the other Hawaiian islands. The airport in Kona, HI is now officially my favorite airport. It's all outside. The check-in counters and gates are in a series of open-air hut-type structures. As soon as we landed, we were enjoying the island air.
On our way from the airport, I noticed graffiti in the black volcanic rock. But it's not painted graffiti. It's messages that people have left with white rocks. Here's one of my favorites:
We spent the rest of the day enjoying the lagoon, pool, and ocean around the hotel:
Return tomorrow for a recap of one of my favorite parts of our trip, a trip around the Big Island and to Volcanoes National Park.
We hit the beach in Oahu in the morning to try some stand-up paddleboarding. Wow, that is harder than it looks. I fell over 3 times trying to balance on the board. But it was fun! I got the hang of it towards the end.
Then we headed to the airport for a quick flight over to the Big Island. Got an awesome view of the other Hawaiian islands. The airport in Kona, HI is now officially my favorite airport. It's all outside. The check-in counters and gates are in a series of open-air hut-type structures. As soon as we landed, we were enjoying the island air.
On our way from the airport, I noticed graffiti in the black volcanic rock. But it's not painted graffiti. It's messages that people have left with white rocks. Here's one of my favorites:
 | |
| BACON! |
We spent the rest of the day enjoying the lagoon, pool, and ocean around the hotel:

Return tomorrow for a recap of one of my favorite parts of our trip, a trip around the Big Island and to Volcanoes National Park.
Tuesday, July 12, 2011
Relaxing on the beach in Oahu
Day 1 -
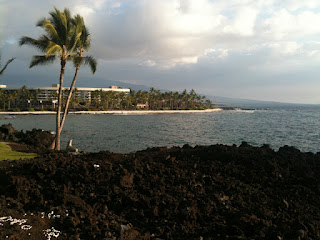
10 hour plus layover flight from DC to Honolulu. We arrived mid-afternoon in time to enjoy some drinks by the beach and this sunset:
Most of the day was spent enjoying the beach:

Come back tomorrow to read about our trip to the Big Island.
10 hour plus layover flight from DC to Honolulu. We arrived mid-afternoon in time to enjoy some drinks by the beach and this sunset:
 |
| Sunset on Waikiki Beach |
Day 2:
Jet lag hit me pretty hard. I fell asleep early and woke up at 3am, so I took these pictures of Honolulu at night and at sunrise:
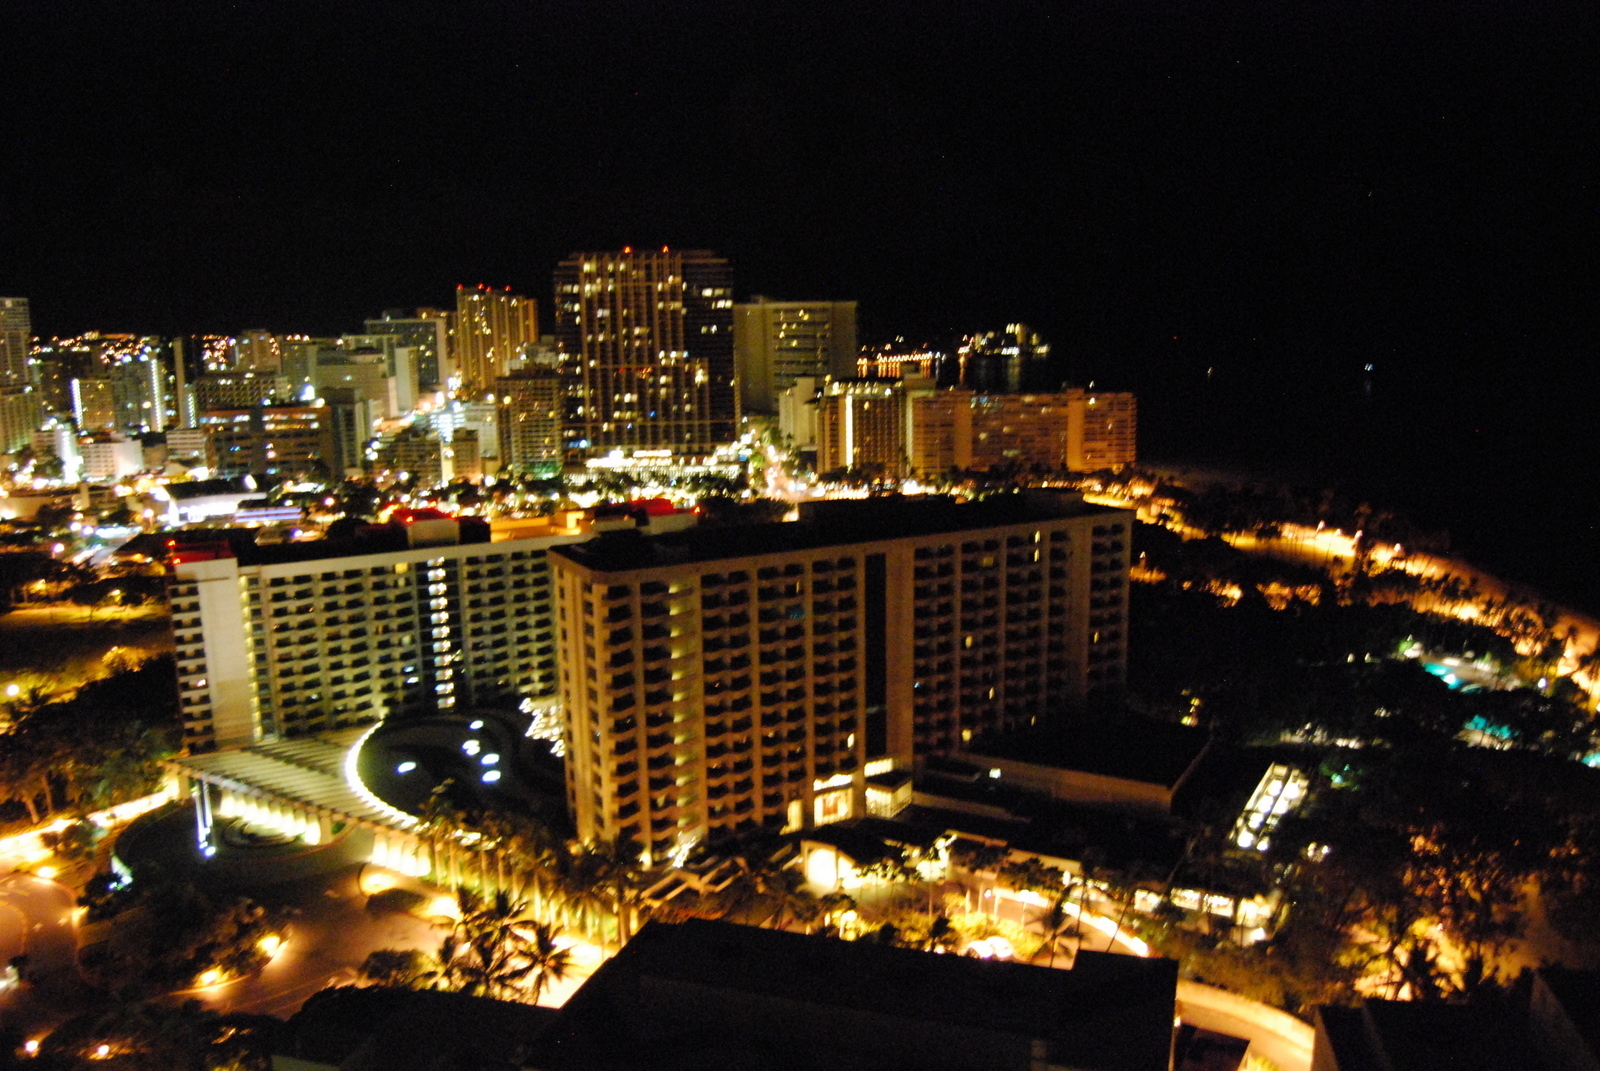 |
| Nighttime in Honolulu |
 |
| Sunrise in Honolulu |
Most of the day was spent enjoying the beach:
 |
| Sea canoes in Hawaii |

Come back tomorrow to read about our trip to the Big Island.
Saturday, July 2, 2011
Moving along
Big changes in my life are occurring this summer. I've titled this post "moving along" instead of "moving on" since "moving along" fits what I'm feeling best: I'm progressing to the next step of life, not forgetting where I've come from, but rather I feel as though I am just further downstream in the natural course of things.
Saying goodbye to the place where my boyfriend and I first lived together. Moving together to a new but temporary place for the summer. Leaving my job of almost three years in order to attend grad school this fall. All of these things have happened in just the past week. Although we had a feeling the move from our apartment was coming, much of it was last-minute. The move from work, I've been planning and preparing for over a year now, but could hardly believe it was actually happening. I don't think it hit me until people started to come say goodbye, and I could barely say words that would do justice to how I felt.
I will keep updating to this blog through this month, and then in August I will start a new one when I move to North Carolina to start grad school.
Friday, April 29, 2011
An element of surprise
People can surprise you. I've found myself wrapped up in notions of what I thought a person would be like, only to find myself pleasantly disproven.
I've been traveling a little bit recently, to make trips to visit grad school open houses and another trip for work. One of my favorite experiences while traveling is meeting unusual people or overhearing unusual conversations.
Recently, I was in North Carolina, and a colleague and I were talking to a bus driver, a real southern good ol' boy type who hated the big city. At one point, he saw a Muslim woman crossing the road, and he remarked, "She's wearing one of them things, what do you call 'em, them veils they wear on their heads? I heard those things got banned somewhere!" I began to suspect that this conversation was not going to go anywhere good or to say the least, not anywhere politically correct. But then, you know what he said?
"Well, I think that's ridiculous! They been wearing them their whole lives! They should wear whatever they want!"
This just made my day - I'd honestly been expecting this guy to say something offensive, just because I'd assumed he might be "socially conservative" (or whatever the current euphemism is), but I was completely proven wrong.
This idea of confronting assumptions and first impressions has been on my mind a fair amount lately. I've dealt with more new situations and new people lately, it seems, with traveling and some other things going on in my life. It can be difficult to be open-minded; the idea of coming to a conclusion about someone or something is seductive. What I mean is that I find myself wanting to make sense of things; deciding that something is or isn't a certain way makes it easy to file it away in my brain and focus on the next thing. But, I'm thinking there's no sense in assuming that I've got it all figured out, otherwise I'm never going to learn anything new.
I'm trying now to push myself out of my comfort zone of things and people I know, and into situations I don't know. This fall, I'm moving out of DC and starting a graduate program in North Carolina. That's the big "comfort zone" change in my life lately, but there have been other smaller ones, like joining a recreational sports team.
So, anyone else have any good stories about people that have surprised you lately? And what are your thoughts on getting out of your comfort zone and keeping an open mind?
Friday, March 11, 2011
Low-carb series: The Low-Carb Cookbook Review
Today I'm reviewing the Low-Carb Cookbook by Fran McCullough. I'm planning to make this part of a series on low-carb cookbooks.

I'm looking at cutting down on sugars as an interesting health and culinary challenge. I love to try new ways of cooking food or planning meals. What is living a life without carbs all about? It's not all burgers all the time. In fact, I feel that low-carb recipes make me think more about eating vegetables and using seasoning and flavor to make up for sugar and starch.
I would definitely recommend this book as a beginner's guide to low-carb eating. The author clearly walks us through low-carb food groups and how they can be prepared. For example, there's a section on vegetables that gives about 3-4 different ways to cook each vegetable. I like that the book did not rely on weird substitutes for high-carb foods, but instead capitalized on existing, familiar foods like eggs, cheese, vegetables, and seasonings to make satisfying meals. Along with the recipes, this book lists menu ideas, like the South American Menu, the Italian Menu, and the Simple Dinner menu, which saved me time in planning.
I also appreciate a good index, which this book has. I tell you, I get pretty annoyed with a book with an index that has enough cross-references to make me feel like I'm reading a Choose Your Own Adventure book.
What I've tested: I've made a variety of beef and pork dishes, 3 different ways of cooking zucchini, a cauliflower side dish, some spicy shrimp, a greek salad, and some fun things like chimichurri sauce, spicy mayo, and corn chips. I'll post some of these up eventually. These all turned out incredibly well, with simple, successful flavors, with the exception of the corn chips. I did not have a good baking sheet, so my chips did not brown evenly and got burnt on the edges.
However: I would not recommend this book to those who are focused on 30 minute-or-less meals, or for those who like to make one dish that can be the entire meal. What I found in this book were recipes that required a fair amount of marinating, cutting, boiling, steaming, baking, and pureeing before they were ready to be eaten.
For example: I made steak with chimichurri sauce with baked zucchini for dinner one evening, and it took me two hours. Cooking is a hobby for me, but even I was frustrated with how long it took. True, I could have done a little bit more on the preparation side, but the book didn't provide any estimates of how long the meals would take to prepare, either. Many of the dishes I made had a long cooking time, taking at least 30 minutes or more to bake. I learned my lesson and ended up making many of the recipes on a weekend when I had some down time.
For example: I made steak with chimichurri sauce with baked zucchini for dinner one evening, and it took me two hours. Cooking is a hobby for me, but even I was frustrated with how long it took. True, I could have done a little bit more on the preparation side, but the book didn't provide any estimates of how long the meals would take to prepare, either. Many of the dishes I made had a long cooking time, taking at least 30 minutes or more to bake. I learned my lesson and ended up making many of the recipes on a weekend when I had some down time.
The beginning of the book discusses the health benefits of low-carb. However, it's geared towards dieters and ignores people who might be interested in low-carb for other reasons. So, for a book whose "target" audience is presumably calorie- or carb-conscious, the book surprised me when it didn't list calorie or carb counts for any recipes. The author throws out descriptions like "low on carbs!" but she doesn't give any numbers to back it up. If you crave the numbers, you're not going to find that in this book.
Lastly, the author's writing style grated on my nerves. "Nothing's stopping you from serving these potato skins with sour cream." Sure it is. I don't have sour cream in my house!
In conclusion, this book gets 3.75 stars out of 5 for me. Great recipes, poor delivery.
Subscribe to:
Posts (Atom)